Monday 18 August 2014

sewing like there's no tomorrow

 
I've been sewing a lot in the last few months. 

Most lately, I started on a receiving blanket in a thrifted jersey that has the cutest Miffy-esque print. I still need to buy backing, and hem it together but it's almost there.
 
Before that, I made a baby sling from thrifted blue paisley and some tomato red jersey. It turned out to be too long, probably due to having to measure across the bump, but I decided I wait until baby's here and shorten it then.
Before that, I made another pair of thai fisherman's pants, out of a thrifted length of blue washed silk for boyfriend.


By the way, would any of you like to have the thai fisherman's pants basic sewing pattern in the post?

I changed my pattern slightly to suit my sewing preferences more so I don't need the basic one anymore. Instead of putting it in the paper recycling, I thought I'd offer it here in case somebody fancies having it. If yes, leave a comment below! (If there's more than one takers, I'll put the names into a little draw.)

Anyway, in my ninth month of pregnancy now even the goal of finishing the receiving blanket seems very ambitious.Although it's a matter of sewing around the fabric twice... I'd really like that Miffy-esque print to cuddle our babe so it will be the last thing I sew before I stop being creative for a while...

Sunday 17 August 2014

sun prints


It was exciting and fun to make sun prints for my graduation project many-many years ago... I used daylilies and different kinds of fabrics soaked in a cyanotype concoction I bought from a photography store. The above examples are some samples I dug out from the depths of my fabric cupboard; they are from that long-ago project of mine.

Making sun prints again would be a nice way to soak up and make the most of the remaining rays of August, don't you think?

Have a sunny Sunday!


Friday 15 August 2014

the case of the fifty cents find


The other day, while doing general food shopping, I popped in to one of the two local charity shops on my way home to see if they had a lid for my latest Pyrex score. And what do you know, a perfect one in the right size complete with the JAJ logo was waiting for me right there on the shelf, priced at fifty cents.

I was rather unprepared for this to actually happen - I had no change on me, just my plastic. I didn't think paying fifty cents by card in a charity shop a decent thing to do, the transaction probably costs more that that... So I delved deeper into the junk to see if I could find some other nice things to put in my basket too. 

In the fabric room, I pulled out a lovely old screen printed panel from a big box. It's a double panel, I folded it in half for the photo. Maybe it'd be nice to fix it on the wall properly above baby's bed, and perhaps later it could be cut up for a quilt.

I also picked up two squishy sponge cubes covered in a fabric with Russian Cyrillic letters. I would have liked if there was a third one also, but I didn't want to leave these two behind just because there wasn't. Baby has two little hands after all, so one cube to squish in each.

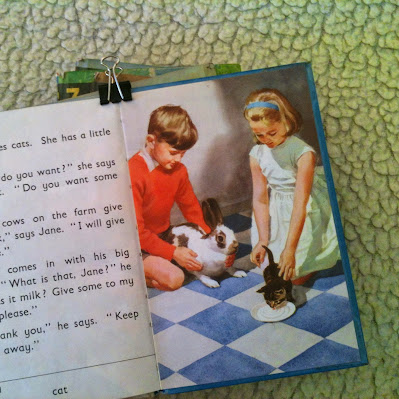
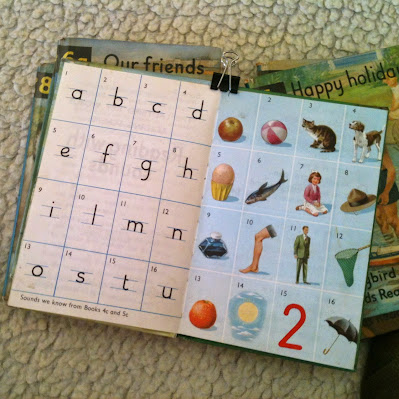
And then I came across a pile of lovely old Ladybird books, which I think surprised me even more than finding the perfect Pyrex lid on impulse... Eight sweet old English children's books from the 1960s cropping up in this small Finnish town... I was delighted! They also cost fifty cents each, so once they were in the basket I went to the till and payed up feeling rather happy.


Monday 11 August 2014

after the storm

A little pictorial update on the balcony - the sunflowers are taking their time to show their full beauty, so it's still mainly just greenery.

Last week's thunderstorms were a welcome relief from the heat, both us and the plants had a chance to refresh, which meant a few days' worth of better night's sleep in a cooler bedroom for me.

I really like how things are after a rainfall, with colours intensified and the air freshened smelling of wet earth.

Friday 8 August 2014

vintage Hungarian cheese labels

I thought it'd be a good time to show you my vintage Hungarian cheese label collection, while I'm a bit unmotivated about browsing in the thrifts due to the soaring temperatures we are having here.

These cheese labels were an impulse buy from Ebay a few years ago. I think they cost me seven pounds with postage, and I only had to very briefly battle with one more bidder for them... I don't look for thrifty stuff on Ebay anymore, but for a short period of time all those years ago I used to hunt for vintage paper ephemera on there.

I reckon the trigger for my bidding was the childhood nostalgia that rose up in me as soon as I spotted a couple of cheese brands in the batch that used to be part of my school lunches and elevenses for years as a kid.


And the ones that are older than me were just so beautiful - my parents and grandparents surely remember them. Just love their screenprinted colours and the lettering.


Before we moved countries, I had these old labels arranged and framed up in a big steel A3 picture frame. Right now they live in an envelope. After pulling them out for this post I thought I really ought to get them framed again - they'd happily hang in the kitchen and become best mates with our vintage clock for sure...

Monday 4 August 2014

quilt progress #5 - it's ready!


Yes, the quilt is ready! Before I show you the finished state, let me tell you first how I framed it with bias binding cut from the same fabric as the backing. I opted for bias binding because it won't wear out as easily as other edgings.

For bias binding, you need to cut at a 90 degree angle across the straight grain. Put a set square to the fabric's straight edge like in the picture below - the set square's long edge will show you the true bias. I use a long ruler to draw up the binding strips. To bind a 1 cm edge you will need to cut a 4 cm wide bias strip = 1 cm times two plus 1 cm seam allowance at both edges.

I needed around 4 and a half metres of bias binding, so I planned for 5 meters to be generous. Of course none of the strips cut would be as long as that. It doesn't matter, because it's really easy to join up bias strips - the only rule is that you need to sew them together at an angle, like so:
 

Once I had my bias strips ready, I first spent some time basting the edges of the quilt to prepare for sewing. You don't necessarily have to do this; the quilting stitches should hold everything together. The reason I basted was because my charms ended up on the bias at the edges of the quilt which makes the fabric stretchy, and I wanted no chance of distortion during sewing. Once all was secure, I pinned on the bias binding and stitched it on.

 
Usually you'd want to have a nice machined seam to show at the front, and then a hand-finished edge (or a very precise machined edge) on the back. 

After unpicking three times, I decided that I'll have to do it the other way around. My difficulty was that I wanted the binding to join exactly to the tip of the nice squares along the front, but I'd always end up sewing slightly over or under it... 

So I machined on the back and then proceeded to hand-finish at the front, in order to be super exact about where the points and edges met. I got on with the hand-sewing phase while watching old Miss Finland competitions from the 1950s and 60s on TV.
 

I need to mention that I cannot do a proper mitred corner to save my life. I struggled with it long enough by now trying to understand the actual technique to no avail, so I just made up my own solution.

I bound the blanket's shorter edges first. Then did the longer edges, leaving the joining 1 cm unstitched at each corner. Then just folded and tucked and hand-stitched until they looked like mitred corners. I'm sure it doesn't fool the pros but it looks good enough to me.


So, after 3-4 months of labour of love, this first quilt for our first baby is finally ready!

Sunday 3 August 2014

a much needed zippered pouch


You're probably familiar with the scenario - for the 'you never know' moments you keep all sorts of 'just in case' items in your handbag. It's the sensible thing to do. But in my experience, these things knock around in there loose for so long that by the time they are needed, they've become unusable... dirty, broken or even lost.

Finally I got around to answer this issue: I made a wipe-clean pouch that zips up, holding all the small essentials in one place. Now my emergency pills, pads and the like can enjoy their own compartment in the mess of my everyday handbag.

I made it out of a piece of waxed tablecloth, and lined it in some scraps from the fabric cupboard. I've added a key ring too, for my bicycle key.


So that's another item to cross off the list!


Related Posts Plugin for WordPress, Blogger...